Driving home from Napa, still under the spell of the best fried chicken I have ever had, I started planning on recreating Thomas Keller’s famed fried chicken. There are two things that set Keller’s fried chicken apart from the rest. First, the chicken is brined for 12 hours in a herb-lemon brine, which seasons the meat and makes it moist and juicy. The key ingredient is lemon, which goes wonderfully with chicken. And second, the chicken is dredged in flour seasoned with garlic and onion powders, paprika, cayenne, salt and pepper, then dipped in buttermilk and then dredged again in the flour.
The following day I bought myself a copy of Ad Hoc At Home and then assembled the ingredients for my very first homemade Ad Hoc fried chicken.
Buying and Brining the Bird
The recipe calls for 2-1/2 to 3 pound chickens. As Keller suggests, cooking smaller chickens, typically found in farmers’ markets and smaller grocery stores, gives the optimum meat-to-crust proportion, which is critical to excellent fried chicken.
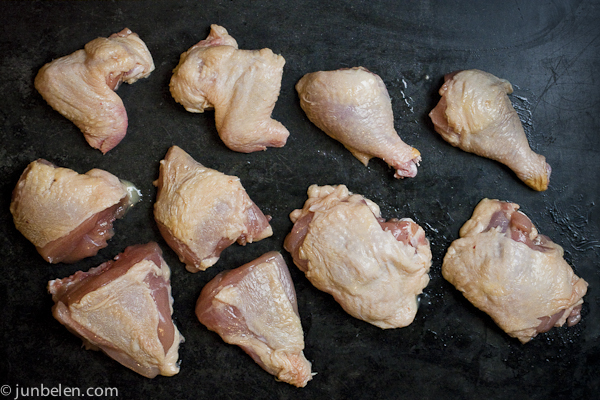
Cut the whole chicken into 10 pieces: 2 legs, 2 thighs, 4 breast quarters, and 2 wings. Keller is a huge advocate of buying whole chickens. It’s a way to become more intimate with the act of cooking, he says and I agree. For those who have not attempted to cut a whole chicken before, let me forewarn you: it is not easy. But I guess like anything else, practice makes perfect. For the faint of heart, you can always buy a whole chicken and have it butchered before taking it home.
For the Chicken Brine
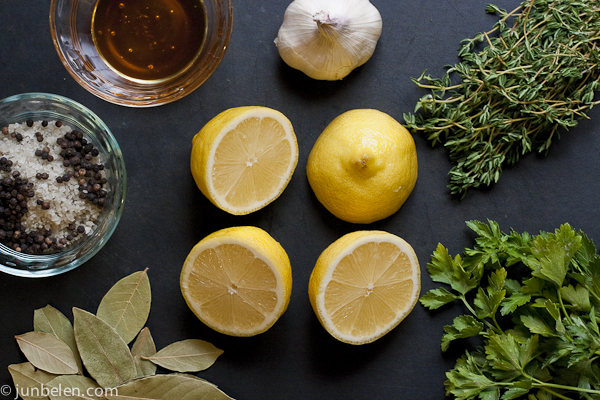
5 lemons, halved
24 bay leaves
1 bunch (4 ounces) flat-leaf parsley
1 bunch (1 ounce) thyme
1/2 cup honey
1 head garlic, halved through the equator
1/4 cup black peppercorns
2 cups (10 ounces) kosher salt
2 gallons water
Combine all the ingredients in a large pot, cover, and bring to a boil. Boil for 1 minute, stirring to dissolve the salt. Remove from the heat and cool completely, then chill before using. The brine can be refrigerated for up to 3 days.
The recipe makes two gallons of brine that is good for 10 pounds of chicken (3 to 4 whole chickens), which may be a bit much for a single person, a couple or a small family. I recommend either brining a big batch and freezing the brined chicken that you won’t use or simply dividing the recipe accordingly depending on how much chicken you are going to cook. I made fried chicken using a single 3-pound chicken and ended up using 1/3 of the amount of each ingredient and it worked fine. The important thing to remember is to keep the proportions intact.
Pour the brine into a container large enough to hold the chicken pieces, add the chicken, and refrigerate for 12 hours. The chicken may be too salty if you brine the chicken for more than 12 hours.
Remove the chicken from the brine, rinse with cold water, pat dry with paper towels and let it rest at room temperature for over an hour.
Dredging and Frying the Bird
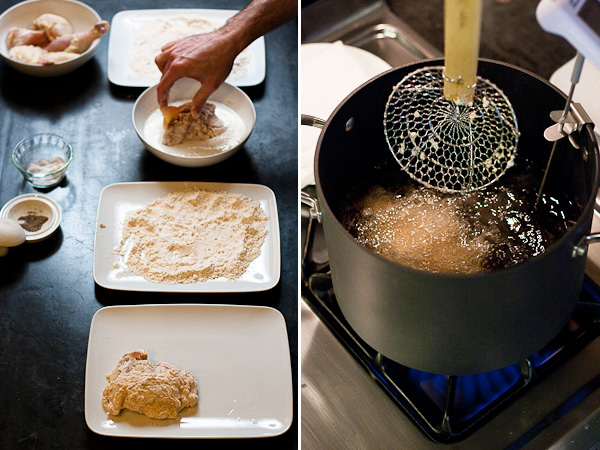
Keller recommends peanut oil for deep frying, which I found to be rather elusive when I was shopping for groceries. I ended up using canola oil, which he, likewise, recommends. Fill the pot with at least 2 inches deep of oil and heat to 320 degrees F. If you have the luxury of two large pots and a lot of oil, you can cook the dark meat in one pot and white meat in another pot. Otherwise, cook the dark meat first, then turn up the heat and cook the white meat. Note that the oil should not come more than 1/3 of the way up the sides of the pot.
For Dredging and Frying
1 quart buttermilk
Kosher salt and freshly ground pepper
peanut or canola oil
For the Coating
6 cups all purpose flour
1/4 cup garlic powder
1/4 cup onion powder
1 Tbsp plus 1 tsp paprika
1 Tbsp plus 1 tsp cayenne
1 Tbsp plus 1 tsp kosher salt
1 tsp freshly ground pepper
Combine all the ingredients in a large bowl. Again the coating recipe is good for a large batch. For frying just a single 3-pound chicken, I found that using 1/3 of the amount of each ingredient is more than sufficient. Do not be too consumed about measuring the right amount of spices. Feel free to experiment and use the recipe just as a guide.
Transfer half the coating to a second large bowl. Pour the buttermilk on a third bowl and season with salt and pepper. Set up a dipping station: the chicken pieces, one bowl of coating, the bowl of buttermilk, and the second bowl of coating.
Start with the chicken thighs. Just before frying, dip the chicken thighs into the first bowl of coating, turning to coat and patting off the excess. Dip them into the buttermilk, then dip into the second bowl of coating. Carefully lower the thighs into the hot oil. Adjust the heat as necessary to keep the temperature of the oil at 320 degrees F. Turn the chicken pieces carefully around in the oil and monitor the temperature. Fry until the chicken is deep golden brown in color, cooked through and very crispy. The recipe recommends 11 to 12 minutes of frying but, seriously, one important thing I realized is that if you follow the recipe (or any recipe for that matter) to the dot and you get too consumed about details you end up burning the chicken! Frying for 11 to 12 minutes is not set in stone. The deep golden brown color, I think, is a better gauge of completeness.
Keller recommends skimmers and spiders instead of tongs when handling the chicken pieces. Lifting food from below, rather than pinching onto it, allows you to work the food gently.
Transfer the fried thighs to a cooling rack skin-side-up to allow excess fat to drain. Make sure that the oil is at 320 degrees F. Coat and fry the chicken drumsticks. Turn up the heat and set the oil temperature to 340 degrees F. Coat and fry the chicken breast and wings. Make sure to carefully lower the chicken pieces into the hot oil and fry until golden brown and cooked through.
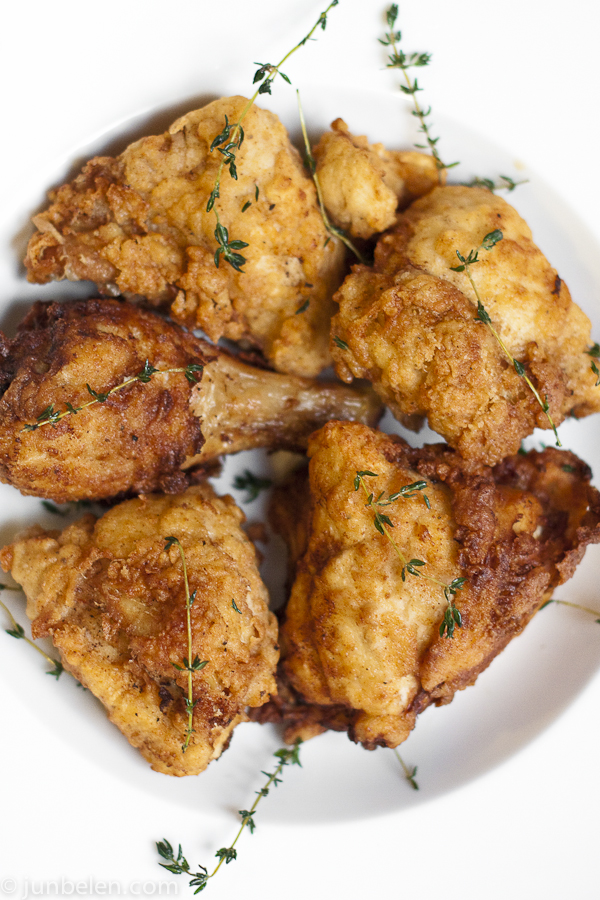
Arrange the chicken on a serving platter. Add rosemary and thyme sprigs to the oil, which will still be hot and you’ll know what I mean when you drop the herb sprigs in the hot oil. Let them cook and crisp for a few seconds and use them to garnish your chicken.
A final Keller note is that they let the chicken rest for 7 to 10 minutes after it comes out of the fryer. If the chicken has rested longer than 10 minutes, keep the chicken in a 400 degree F oven for a minute or two to ensure that the skin is crisp and the chicken is hot.


